STEP:
1. Insert the Windows XP CD into your computer and restart your computer.
2. If prompted to start from the CD, press SPACEBAR. If you miss the prompt (it only appears for a few seconds), restart your computer to try again.

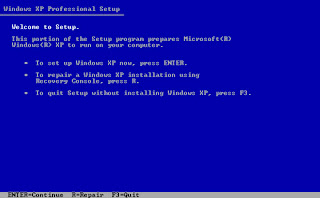
3. Windows XP Setup begins. During this portion of setup, your mouse will not work, so you must use the keyboard. On the Welcome to Setup page, press ENTER.
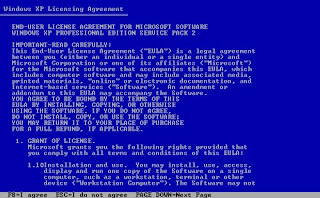
4. On the Windows XP Licensing Agreement page, read the licensing agreement. Press the PAGE DOWN key to scroll to the bottom of the agreement. Then press F8.
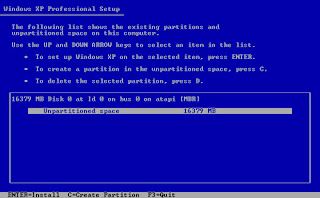
5. This page enables you to select the hard disk drive on which Windows XP will be installed. Once you complete this step, all data on your hard disk drive will be removed and cannot be recovered. It is extremely important that you have a recent backup copy of your files before continuing. When you have a backup copy, press D, and then press L when prompted. This deletes your existing data.
6. Press ENTER to select Unpartitioned space, which appears by default.
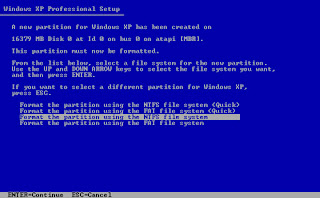
7. Press ENTER again to select Format the partition using the NTFS file system, which appears by default.
8. Windows XP erases your hard disk drive using a process called formatting and then copies the setup files. You can leave your computer and return in 20 to 30 minutes.
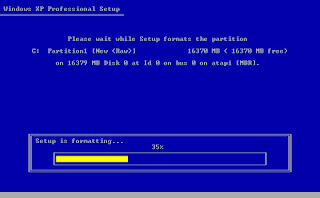
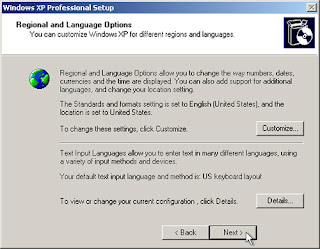
9. Windows XP restarts and then continues with the installation process. From this point forward, you can use your mouse. Eventually, the Regional and Language Options page appears. Click Next to accept the default settings. If you are multilingual or prefer a language other than English, you can change language settings after setup is complete.
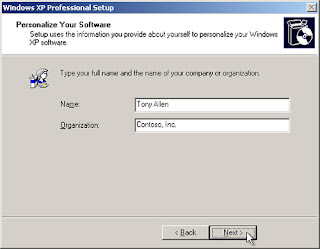
10. On the Personalize Your Software page, type your name and your organization name. Some programs use this information to automatically fill in your name when required. Then, click Next.
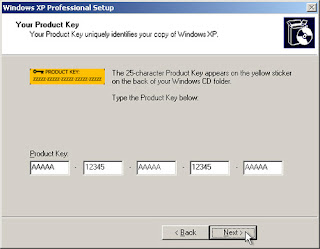
11. On the Your Product Key page, type your product key as it appears on your Windows XP CD case. The product key is unique for every Windows XP installation. Then, click Next.
12. On the Computer Name and Administrator Password page, in the Computer name box, type a name that uniquely identifies your computer in your house, such as FAMILYROOM or TOMS. You cannot use spaces or punctuation. If you connect your computer to a network, you will use this computer name to find shared files and printers. Type a strong password that you can remember in the Administrator password box, and then retype it in the Confirm password box. Write the password down and store it in a secure place. Click Next.

13. On the Date and Time Settings page, set your computer’s clock. Then, click the Time Zone down arrow, and select your time zone. Click Next.

14. Windows XP will spend about a minute configuring your computer. On the Networking Settings page, click Next.

15. On the Workgroup or Computer Domain page, click Next.

16. Windows XP will spend 20 or 30 minutes configuring your computer and will automatically restart when finished. When the Display Settings dialog appears, click OK.

17. When the Monitor Settings dialog box appears, click OK.

18. The final stage of setup begins. On the Welcome to Microsoft Windows page, click Next.

19. On the Help protect your PC page, click Help protect my PC by turning on Automatic Updates now. Then, click Next.

20. Windows XP will then check if you are connected to the Internet:
• If you are connected to the Internet, select the choice that describes your network connection on the Will this computer connect to the Internet directly, or through a network? page. If you’re not sure, accept the default selection, and click Next.

• If you use dial-up Internet access, or if Windows XP cannot connect to the Internet, you can connect to the Internet after setup is complete. On the How will this computer connect to the Internet? page, click Skip.

21. Windows XP Setup displays the Ready to activate Windows? page. If you are connected to the Internet, click Yes, and then click Next. If you are not yet connected to the Internet, click No, click Next, and then skip to step 24. After setup is complete, Windows XP will automatically remind you to activate and register your copy of Windows XP.

22. On the Ready to register with Microsoft? page, click Yes, and then click Next.

23. On the Collecting Registration Information page, complete the form. Then, click Next.

24. On the Who will use this computer? page, type the name of each person who will use the computer. You can use first names only, nicknames, or full names. Then click Next. To add users after setup is complete or to specify a password to keep your account private, read Create and customize user accounts.

25. On the Thank you! page, click Finish.

Congratulations! Windows XP setup is complete. You can log on by clicking your name on the logon screen. If you’ve installed Windows XP on a new computer or new hard disk drive, you can now use the File and Settings Transfer Wizard to copy your important data to your computer or hard disk drive.
After logon, take a few minutes to validate your copy of Windows. Validation gives you access to hundreds of free downloads from the Microsoft Download Center. To learn about the new features Windows XP provides, click the Start button, click All Programs, click Accessories, and then click Tour Windows XP.
1.2 VISTA
Step #1: Plan your installation
When you run the Windows Vista Setup program, you must provide information about how to install and configure the operating system. Thorough planning can make your installation of Windows Vista more efficient by helping you to avoid potential problems during installation. An understanding of the configuration options will also help to ensure that you have properly configured your system.
I won't go into that part right now (I might later this month, no promises...) but here are some of the most important things you should take into consideration when planning for your Windows Vista installation:
* Check System Requirements
* Check Hardware and Software Compatibility
* Determine Disk Partitioning Options
* Decide on a Workgroup or Domain Installation
* Complete a Pre-Installation Checklist
After you made sure you can go on, start the installation process.
Step #2: Beginning the installation process
You can install Windows Vista in several methods - all are valid and good, it all depends upon your needs and your limitations. In this manual I will focus on the simplest form of installation - directly from the Windows Vista DVD media.
More on other forms of installation can be found in the Windows Vista Information, Tweaking, Tips and Tricks section.
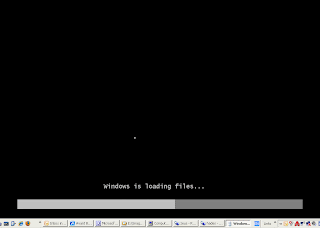
So, insert your Windows Vista DVD media into your DVD drive and reboot your computer. A black window will appear momentarily while the DVD content is read
Step #3: The GUI-based portion of the Setup program
Unlike previous versions of Windows, Windows Vista does not have a noticeable text phase of the setup process, and it will boot directly into the Graphical User Interface (GUI) mode.
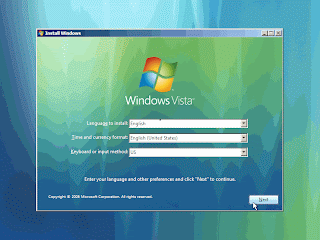
1. After a few moments you will see the first prompt:
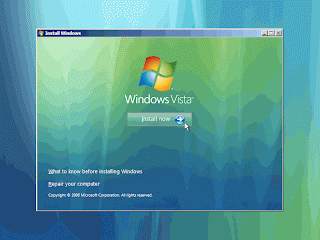
2. Press now the Install button.
3. After a short delay you'll be prompted to enter your product key:
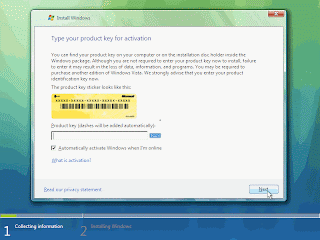
You can skip this part if you don't have the product key handy (read Install Windows Vista Without Supplying the Product Key for more info). However, if you do have a valid product key at that time (and you should have one, we're dealing with legal issues here), then by entering the right key the setup program knows which version of Vista to install.
If you skip it, you'll be prompted for a Vista version that matches your product key (the one you don't have handy at that moment):
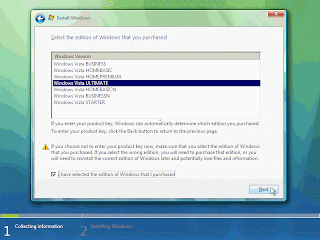
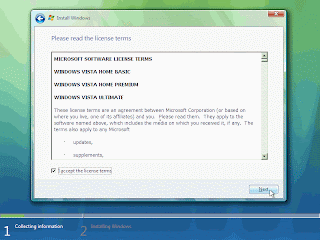
4. You now have to accept the licence terms:
5. Next you need to press the Custom (Advanced) installation type button:
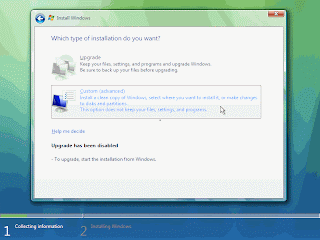
The Upgrade button is disabled because this specific installation if performed on a new computer without any previous operating system on it.
6. The next phase is to pick the installation partition. Since this computer has a new hard disk that hasn't been formatted before, you will only have the option to create a new partition on it. Had it had previous partitions on it you could have chosen to either delete them or perform other tasks. Pressing the Advanced button will bring up the following options.
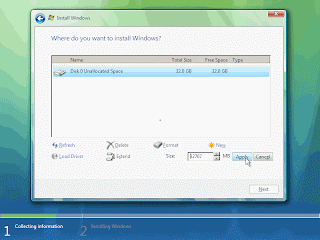
Since we don't need to perform any additional task we will just press on the Next button. The installation process will then create a partition on all the available disk space, and format it.
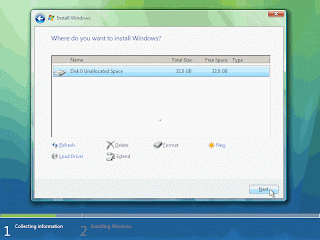
7. The setup process will now begin to copy files from the installation DVD media to the hard disk.
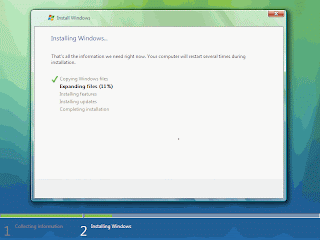
This will take some time:

8. After some time (the exact amount of time will greatly depend on your computer's hardware), the setup process will install updates for the operating system.
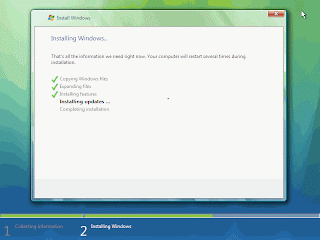
9. The computer will then automatically reboot.
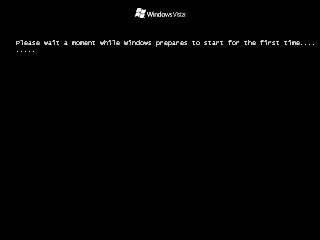
10. Now comes a long waiting period, where the installation process configures the system. Again, the exact amount of time will greatly depend on your computer's hardware.
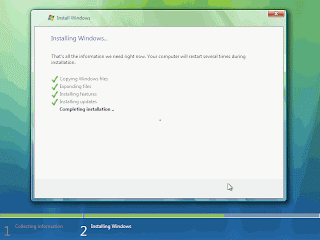
11. After the long wait, the system will then reboot once again.
12. You will think something went wrong because of the relative long time it take the system to display anything besides the black screen, but finally, after a few moments you will note a small colored circle:

13. A few seconds after that you will be prompted to enter a username and password for the first user on the computer.
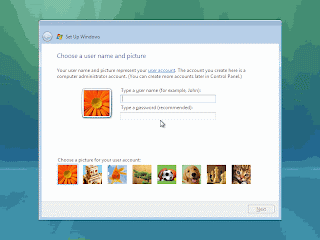
Although the setup program will let you continue without entering a password, note that it is very advisable to enter a password here, and the best option would be to choose a complex password made of at least 7 characters or more (something like P@ssw0rd or MYpa$$w0rd). Make sure you remember it.
Also pick your user's display picture. This can be changed later.
14. Pick a name for your computer. The setup program will create one based upon the username you chose in the previous step, but you can change it now (and later).
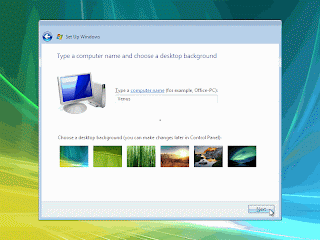
Also pick a background for the user's besktop. This can be changed later.
15. Choose what sort of protection your computer gets. The recommended settings are best for someone that doesn't plan to hide their computer behind a corporate firewall (and even then, in some cases, this would be the best option). If you plan to install a 3rd-party firewall later you can opt to be prompted later.
Note that this setting will also have effect on how the computer uses the Microsoft Windows Update (Automatic Updates) features.
16. Next comes the Time Zone settings window. Choose your location.
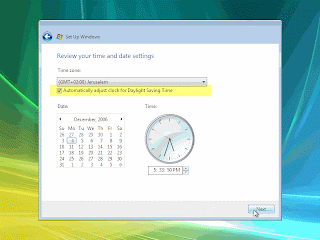
A note for Israeli users: Finally! Windows Vista has the DST setting enabled for us!!!
17. Done! You're prompted with the last setup screen:
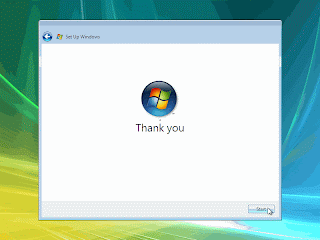
18. Finally, the first screen appears, you're ready to rock and roll!
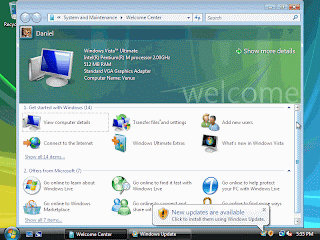
Note that if the computer was connected to the Internet while installing it, it will automatically download and prompt you to install any missing hotfix or update it finds for the current state of the operating system.
Done!
+olwEyz019.jpg)
No comments:
Post a Comment